Getting Started
###Full tutorials
###Opening and creating new files
To create a new file, use the New file menu item in the File menu or press cmd/ctrl-n
To open a file, use the Open file menu item in the File menu or press cmd/ctrl-shift-o
###With Clojure
If you have some Clojure code in a file already, you can get going with inline eval by:
- Create a new file and save it with a .clj extension or open a .clj file
- Press Cmd/Ctrl+Enter to evaluate a form
- Wait for the client to connect (this can take a bit the first time)
- Once connected you’ll see your result.
###With Javascript/HTML/CSS
In order to evaluate Javascript, HTML, or CSS, we need a browser to see the result in. To open a browser tab in Light Table:
- In the view menu click the
commands item
- Type “brows” and press enter when the
Browser: add browser tab command is highlighted
- Use the url bar at the bottom to open your page (note: this can be a
file:// url to open an html file locally, or it can be something on the internet/localhost).
Now that we have a place to send our code, let’s open a .js file and eval something:
- Create a new file and save it with a .js extension or open a .js file
- Press Cmd/Ctrl+Enter while the cursor is over a top-level block of code. To eval an inner block, select and then eval it.
- Select the webpage name from the available clients popup
- You’ll now see results inline!
- Evaling from a .css file will inject the css into the page.
- Evaling from an .html file will refresh the browser tab.
###With Python
Getting started with Python is as simple as:
- Create a new file with a .py extension or open a .py file
- While over some code press Cmd/Ctrl+Enter
- Allow Light Table a few seconds while it connects to a python process
- You’ll now see results inline!
If you want to use Light Table to do matplotlib/pylab graphs and such, you’ll want to install the IPython kernel:
- Follow these instructions to install IPython (note: it must IPython 1.0 or greater and you must install pyzmq as well in order for it to work with Light Table.)
- Make sure IPython is on your path
- Restart Light Table
- Open a .py file by pressing Cmd/Ctrl+Shift+O
- Over an expression that will return a graph, press Cmd/Ctrl+Enter
- You’ll see the graph embedded below your expression.
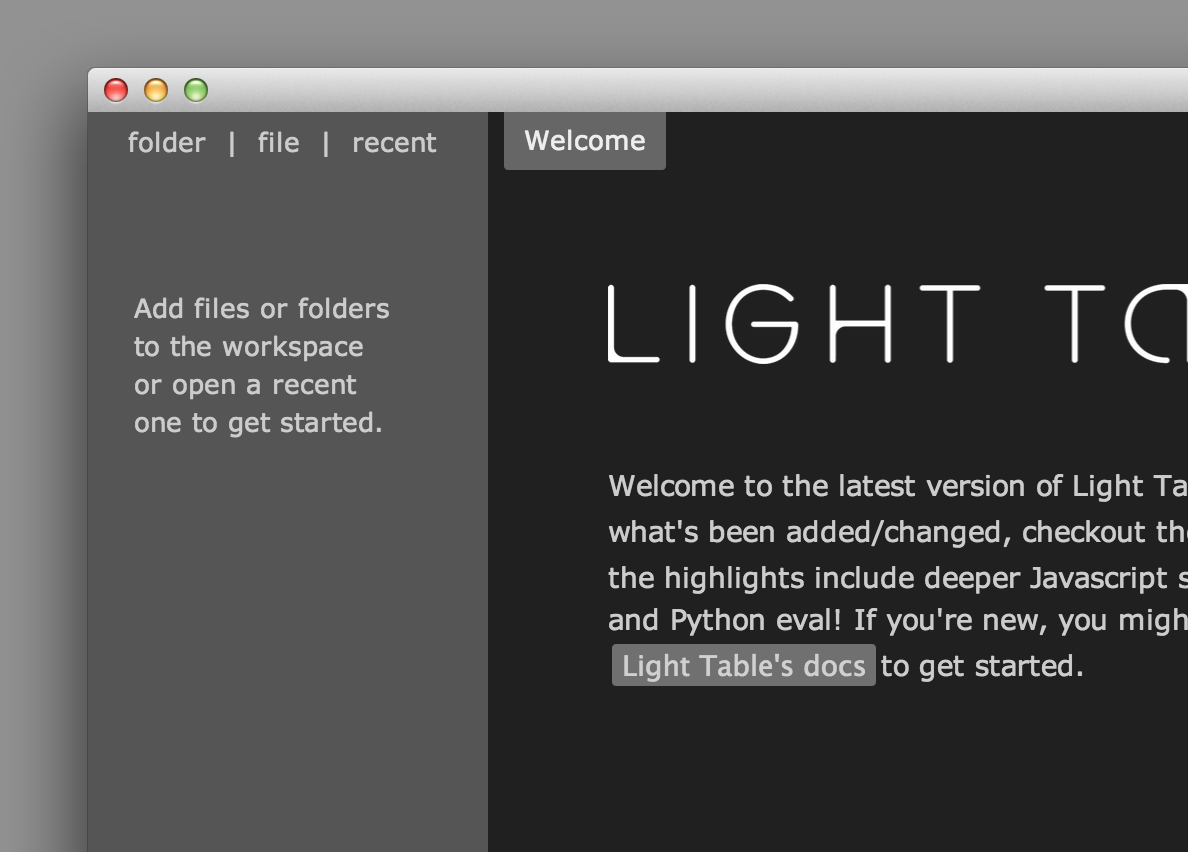
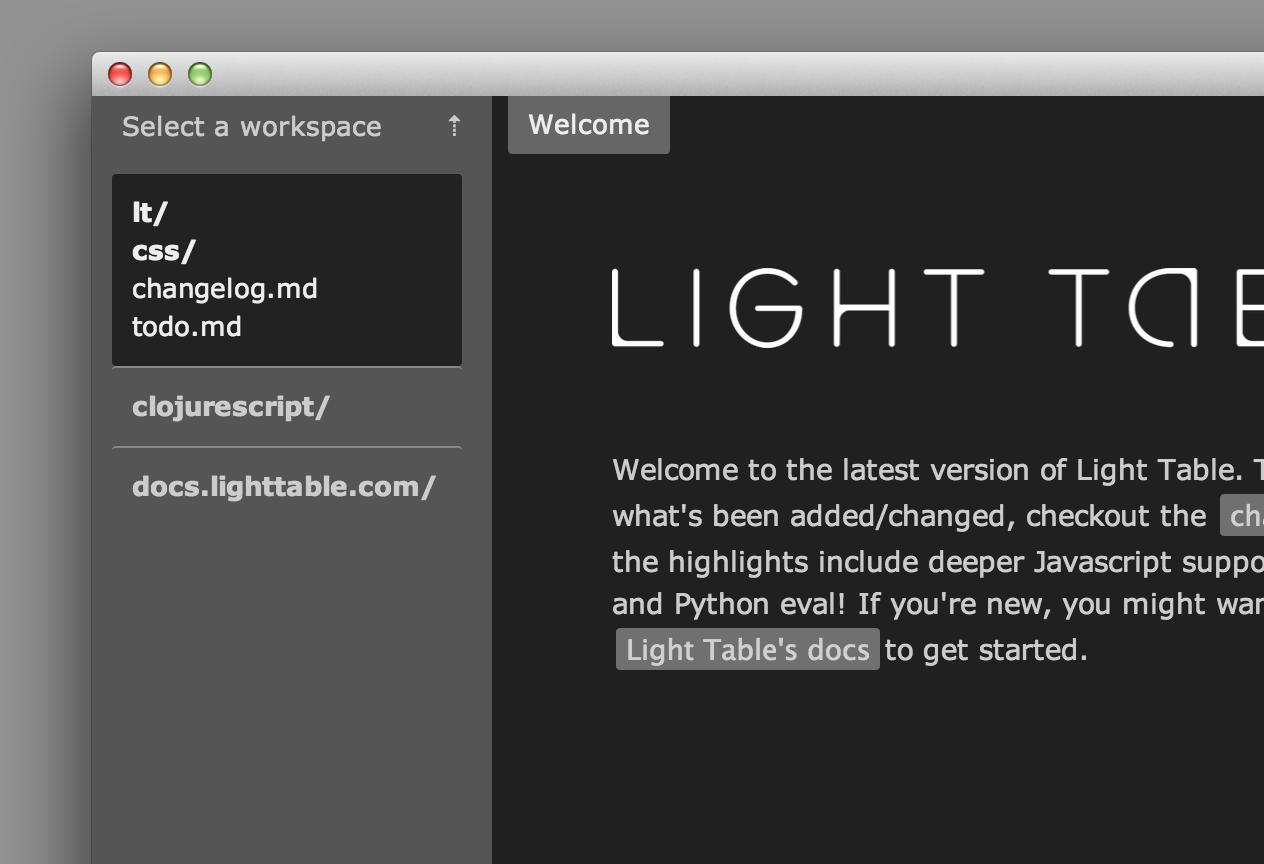
###With the workspace tree (or how to open files)
Opening each file individually through the native open dialogs isn’t very efficient. The workspace tree allows you to instead add files and folders into a file explorer that you can then use to open/rename/delete/etc the files you’re interested in. To open the workspace tree, click the Workspace item in the view menu. You can then add files or folders to the workspace using the buttons at the top.
Once you have items in your workspace, you can use the right-click context menu to do the standard file actions you would expect (rename, delete, new file, etc) as well as remove them from the workspace if you no longer want them there.

When you open a new window of Light Table, you’ll be given a new blank workspace - if you want to switch to a recently used one, click the recent button and select one of your old workspaces from the list.
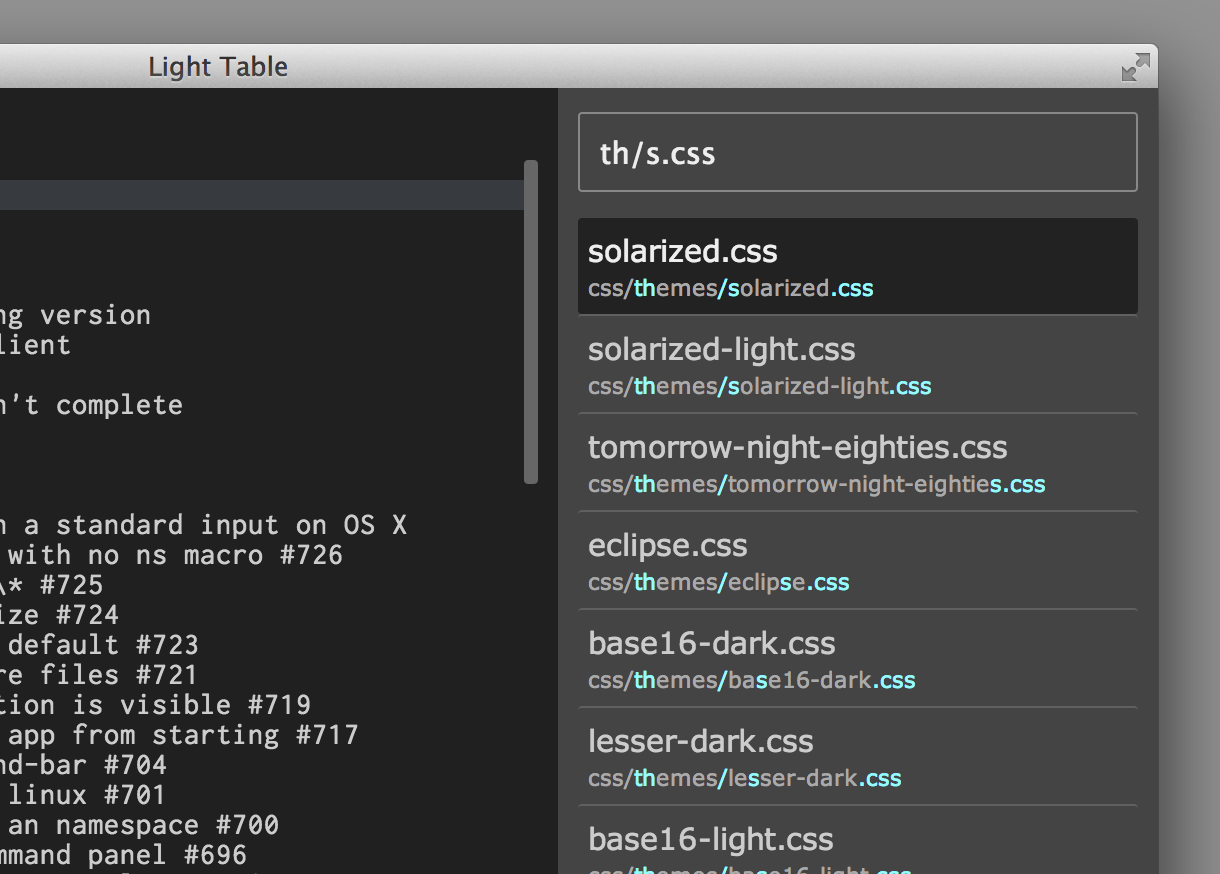
###With the Navigate pane
Once you have files and folders in your workspace, the navigate pane provides the quickest way to open a file by name. Opening it is bound to Cmd/Ctrl+O by default.
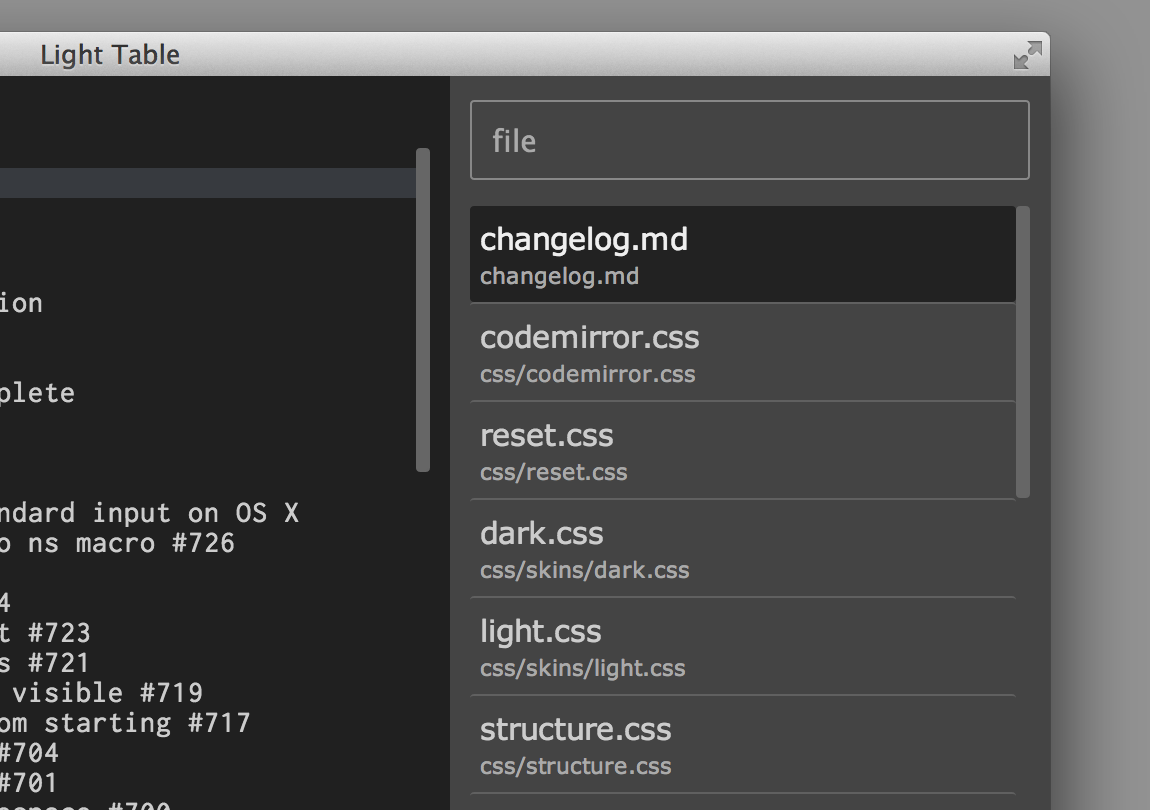
The navigate tab is a “filter list” where typing in the top input will filter the results down to those that match what you’ve typed. All filter lists inside of Light Table use a form of sequential partial substring matching, which is a fancy way of saying that you can type letters and as long as those letters appear in order in one of the list items it will be considered a match. This allows you to type “mcf” to match “my-cool-file” and so on, dramatically increasing efficiency of filter operations.
###With the Connections pane
The connect pane shows you a list of currently connected “clients” that can be used for doing language operations like eval. To open it, use the Connections item in the View menu or the Connect: Show connect bar command.

This list allows you to disconnect a client, which often kills the process it is associated to, or unset a client associated to an editor. You might do the latter when you want to change the context in which you eval something, for example. Clients associated with the currently active editor will appear highlighted.
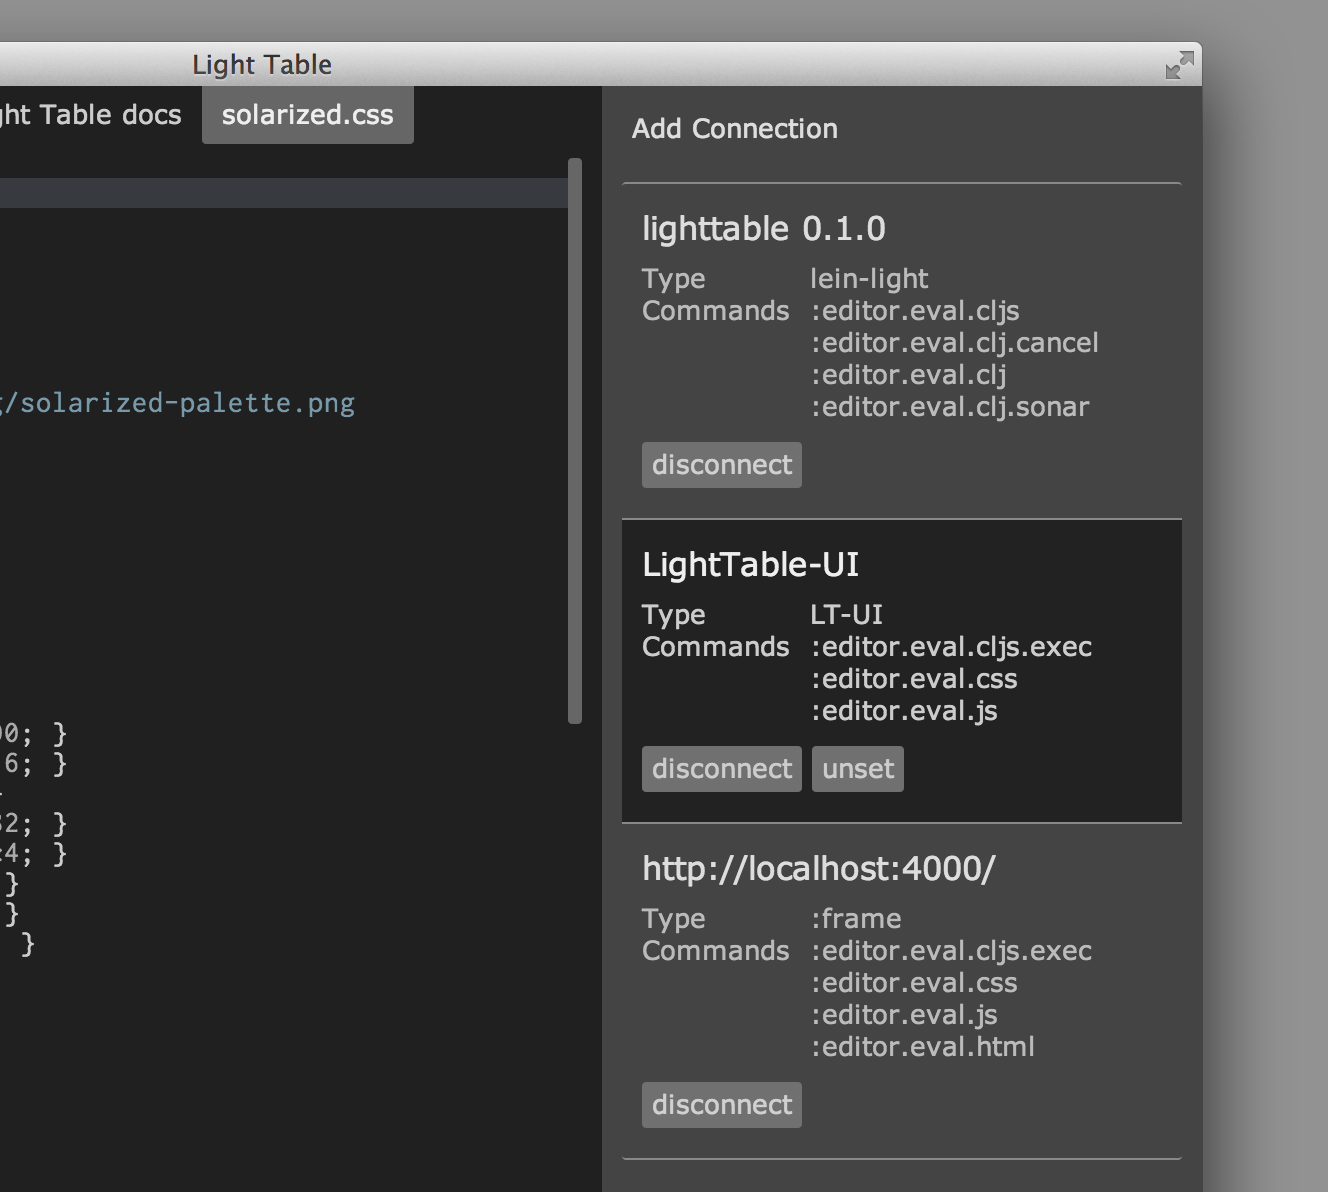
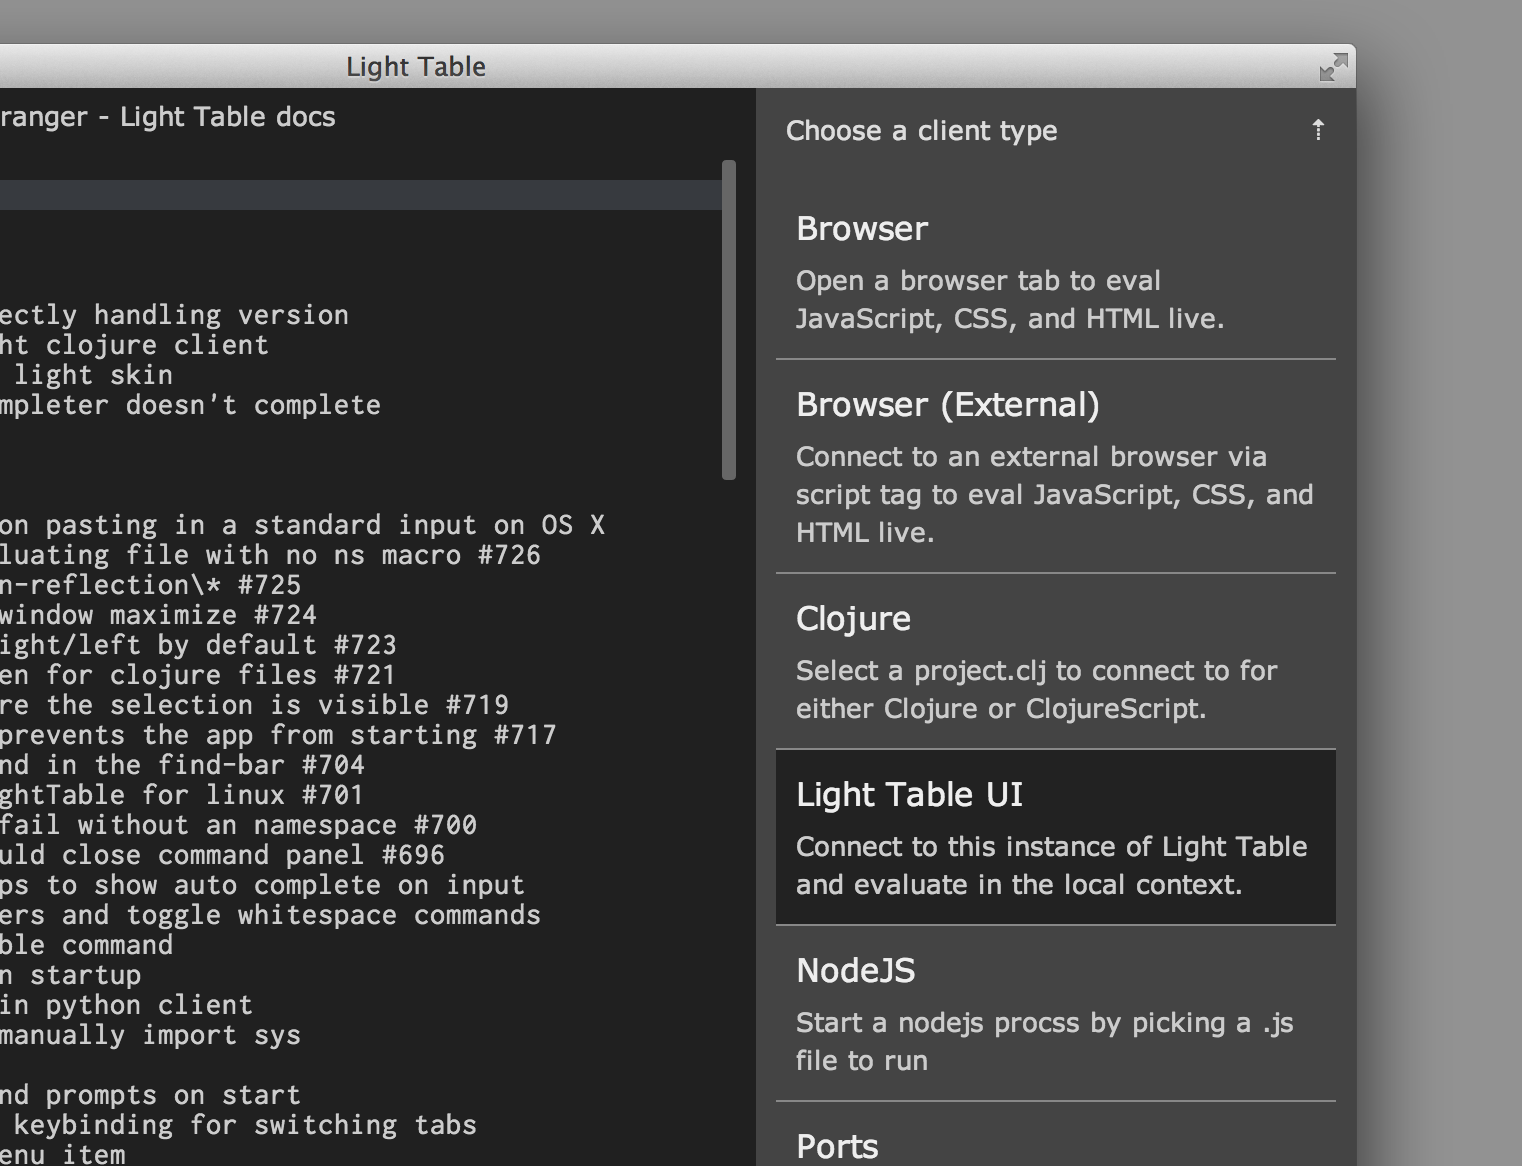
The connect tab also allows you to explicitly add a connection to a client, by presenting a list of all the available client type for you to select one from.
###With the Command pane
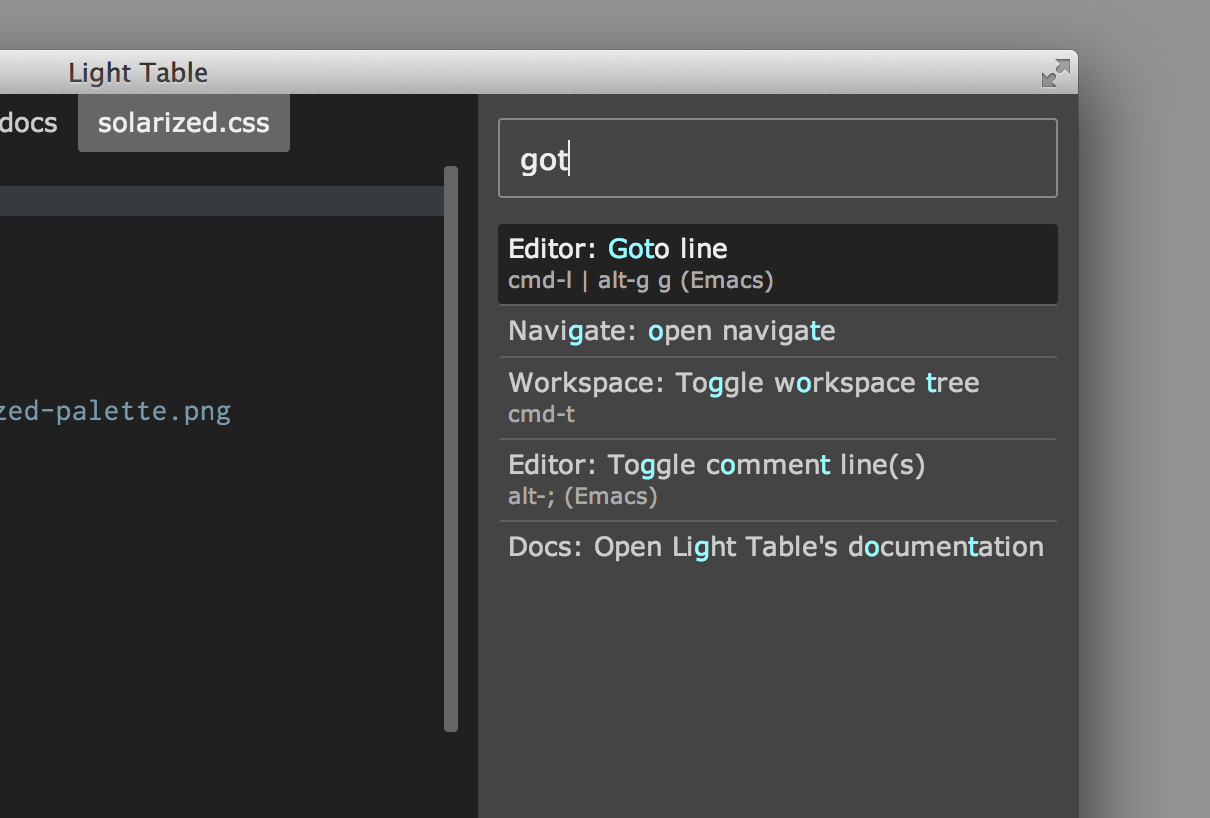
The command pane is your one stop shop to figure out if Light Table can do something. It’s a filter list like navigate that presents a list of all the visible commands in Light Table. Want to open a file or change some setting? Type “open file” or “setting” to filter down to what you want to do and then press enter to do it. Opening the command pane is bound to Ctrl+Space by default, but you can use the Commands item in the View menu as well.
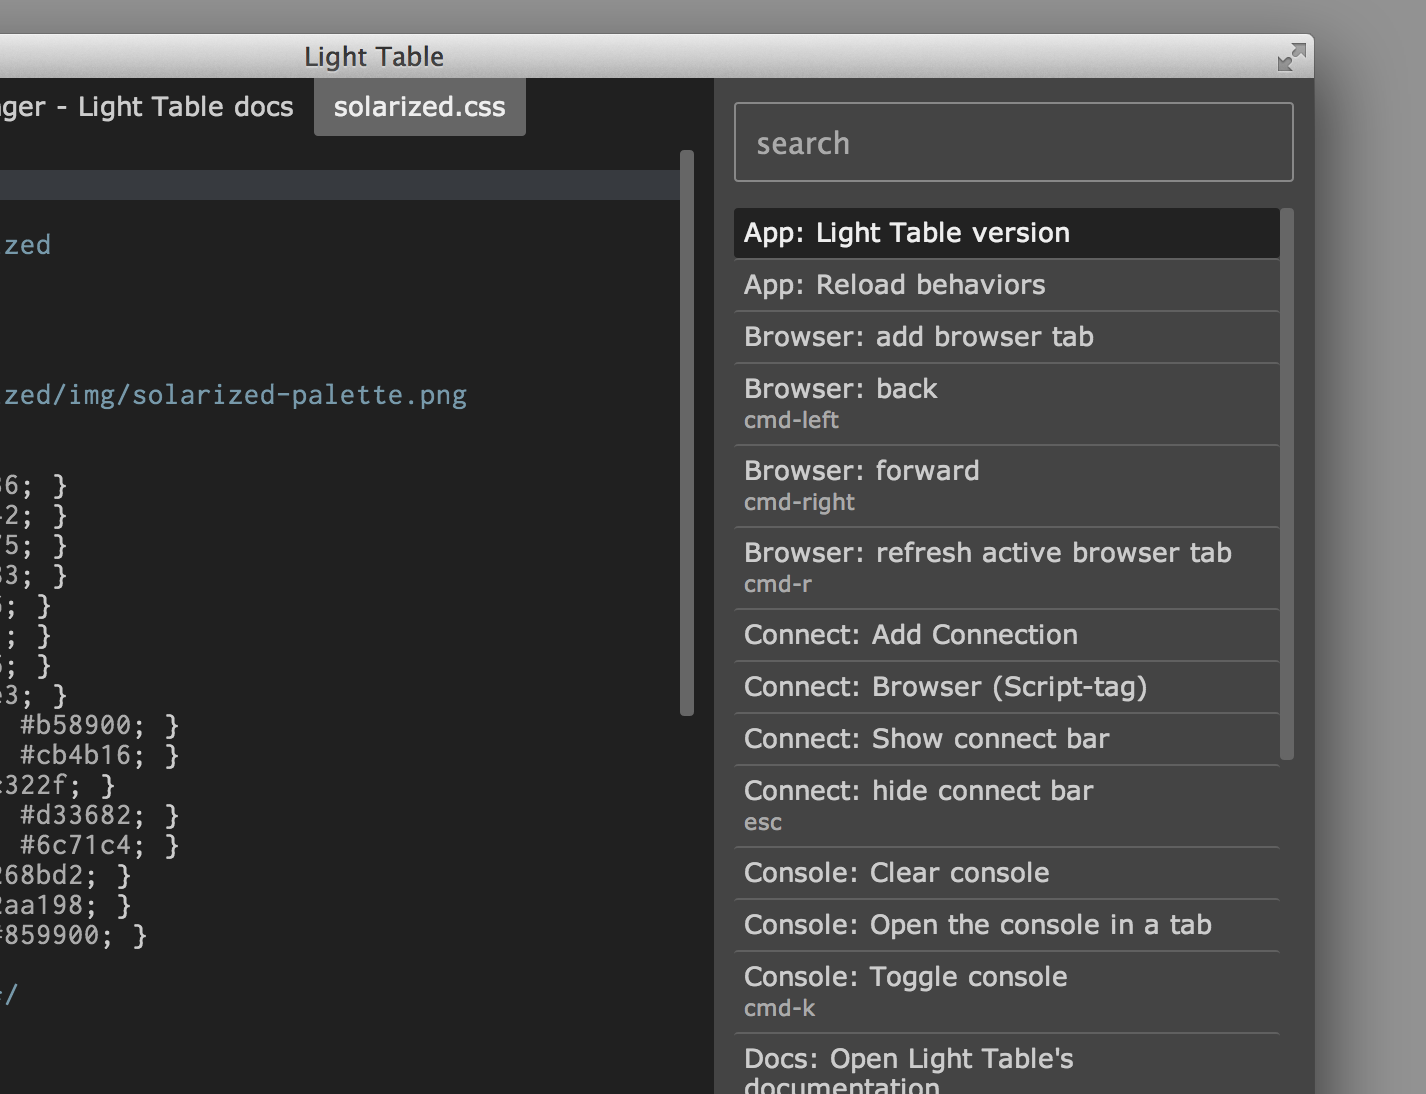
The command pane will also show keybindings for the given command underneath the command’s name.
How Do I...
###Change settings (fonts, line numbers…)?
Settings are represented as behaviors in Light Table. To modify your user behaviors, execute the Settings: User behaviors command and modify the file that is opened. For example, to turn on the line number gutter, find the :editor tag and in the square brackets type “number”. Then select Editor: Show line numbers behavior. This workflow lets you search for the behavior you want via the auto-complete and then the helper will show you what parameters are needed (if any) for that behavior.
All settings in Light Table work this way and behaviors give you the ability to fundamentally change the functionality of Light Table.
###Configure behaviors
To add a behavior to your user.behaviors file, add a vector in the format [:TAG :COMMAND :ARG1 :ARG2 ...] e.g. [:editor :lt.objs.editor/no-wrap]. If a command takes arguments append them after the command e.g. [:app :lt.objs.app/set-default-zoom-level 0.8]. Behaviors that are set by default can be subtracted/removed by prefixing the command with ‘-‘ e.g. [:editor :-lt.objs.editor/no-wrap].
###Change theme
To set the editor theme execute the Settings: User behaviors command, type [:editor :lt.objs.style/set-theme "" ] and in between quotation marks type a theme name (auto-complete will help you here). To see what different themes look like, try the CodeMirror theme demo. Note that some themes listed there may not be available because LightTable may not be on the same CodeMirror version as the demo. To try third party themes, like these ones, download them and add an entry for it in user.behaviors file: [:app :lt.objs.style/provide-theme "theme-name" "/full/path/to/theme/css"]. Once a theme is provided you can set it with the aforementioned set-theme.
###Evaluate code inline?
Within an editor, eval a single “block” (or form if you’re used to LISP) is bound to Cmd/Ctrl+Enter by default and evaling an entire file is bound to Cmd/Ctrl+Shift+Enter. Not all file types know how to eval, to find out what kinds of clients are available for evaluation, open the connect tab and press the “Add Connection” button. This will give you a list of all the clients Light Table knows how to start.
###Change keybindings?
Keybindings are defined in .keymap files in Light Table. To open the user keymap, execute the Settings: User keymap command. To see the default keybindings you can execute the Settings: Default keymap command. Keys are bound based on context (tag), which allows you to create contextual command schemes.
###Configure keybindings
To add a keybinding to your user.keymap file, add a vector in the format [:TAG "KEYBINDING" :COMMAND] e.g. [:editor "alt-w" :editor.watch.watch-selection]. If a command takes arguments wrap the command and its arguments in a parentheses e.g. [:editor "alt-(" (:paredit.select.parent "(")]. If you want to bind multiple commands to the same keybinding, use a simple vector for the whole binding-command e.g. [:editor "alt-(" (:paredit.select.parent "(") :smart-indent-selection]. Keybindings that are set by default can be subtracted/removed by prefixing the key with ‘-‘ e.g. [:app "-ctrl-shift-d" :docs.search.show].
###Split windows?
You can create a new tabset by either right clicking in the tab area and selecting New tabset or by using the Tabs: Add a tabset command in the command bar. To close a tabset you can either use the Tabs: Remove active tabset command or resize it such that it has 0 width.
###Open a new window?
By default, Cmd/Ctrl+Shift+N is bound to the command Window: Open new window, which you can also just execute from the command tab.
###Open a browser tab for live modification?
You can open a browser tab by either using the Browser: add browser tab command or by choosing the browser client type form the “Add Connection” menu in the connect tab. Once open, it is now available as an evaluation client and Cmd/Ctrl+R is bound to refreshing it.
###Bring up auto-completion?
Auto-complete is bound to the Tab key if there’s some non-space character preceding the cursor, otherwise a tab is inserted.
###Eval an arbitraty unit of code?
If you have something selected Light Table will send the selection text for eval if you press Cmd/Ctrl+Enter.
###Eval Clojure?
To eval Clojure, open a .clj file and press Cmd/Ctrl+Enter. Light Table will find a leiningen project if there is one or it will use it’s local REPL client to evaluate your code.
###Eval ClojureScript
You can eval ClojureScript a couple of different
ways. For your ClojureScript project,
building your cljs assets and then pressing Cmd/Ctrl+Enter is recommended. To read more about this
workflow, see the Clojure plugin REAMDE.
###Eval Javascript in NodeJS?
To eval in a Node process:
- Go to the
connect tab
- Click “Add Connection”
- Select “NodeJS”
- Choose a Javascript file to start the node server with.
- Open a .js file
- Press Cmd/Ctrl+Enter
- Select your nodejs client from the popup
###Eval Python?
The easiest way is to simply open a Python file and press Cmd/Ctrl+Enter. This will cause Light Table to start a python client that it can then send code to.
###Use IPython for Python eval?
By default, if Light Table can find a recent IPython installed on your machine, it will use it to provide a much more robust python evaluation environment. If you don’t have it installed, follow these instructions to do so (make sure you install pyzmq as well). With it you can use matplotlib and pylab inline. To see if Light Table is using IPython for Python eval, open the connect tab and look to see if your Python client has the type of ipython. Note that in order for Light Table to use IPython, pyzmq also needs to be installed.
###See the output from STDOUT and STDERR?
When you print from a client, it will appear in the Console, which can be opened by clicking the blue number in the bottom right corner of the editor, from the View menu, or by using the Console: Toggle console command.
###Use a different client once I’ve evaled something?
From the connect tab, find the client and make sure the editor you evaled in is active. The connected client(s) will appear highlighted. Click the “unset” button to force Light Table to re-evaluate what clients are available to eval in the editor.
###Close a client?
From the connect tab, find the client and click the “disconnect” button.
###Install a Plugin
Open the command pane and find the command “Plugins: Show Plugin Manager”. In the manager, search for a plugin. Hover over a search result and click its install button.
###Toggle Vim keybindings?
Install the Vim plugin using the Plugin Manager and then run the command App: Reload
behaviors. If Emacs is already installed, disable it in users.behaviors with [:editor
:-lt.plugins.emacs/activate-emacs].
###Toggle Emacs keybindings?
Install the Emacs plugin using the Plugin Manager and then run the command App: Reload
behaviors. If Vim is already installed, disable it in users.behaviors with [:editor
:-lt.plugins.vim/activate-vim].
###Exclude files from the workspace?
Open your user behaviors and in the :app tag start typing “ignore”. Select the Files: Set ignore pattern behavior.
###Change the location of the lighttable directory?
You can use the environment variable LTHOME to tell the command line scripts where to find LT.
###Find out what version of Light Table I’m using?
Use the App: Light Table version command from the command tab.
###Plugins directory
The plugins directory varies depending on the platform:
- Mac:
~/Library/Application\ Support/LightTable/plugins
- Linux:
~/.config/LightTable/plugins
- Windows:
%APPDATALOCAL%/LightTable/plugins
Alternatively, you can see your location from running the command App: Light Table version.
###User plugin
Your complete configuration, including plugins you’ve installed, is stored in a User plugin. Since the User plugin is just a directory, you can share it by putting it under revision control e.g. git and uploading it to a service like Github. To explore it, add it to your workspace with the command Settings: Add User plugin to workspace. Any custom keybindings and behaviors are added to user.keymap and user.behaviors. To write commands, behaviors and more, see src/lt/plugins/user.cljs. To open your user.cljs at anytime use the command Settings: User script. Inside the default user.cljs is an example command and behavior. If you’re upgrading Light Table, you will need to add two behaviors to user.behaviors in order for the examples to work:
[:app :lt.objs.plugins/load-js "user_compiled.js"]
[:user.hello :lt.plugins.user/on-close-destroy]
Run the command User: Say Hello to see your own command!
###Write a plugin
Plugins are a great way to share your Light Table enhancement with the community. The recommended way to generate one is with lein new lt-plugin my-plugin --to-dir MyPlugin. Make sure to run that it in your plugin directory. Add the generated plugin to your workspace and open the generated .cljs file. With your LT UI connection set up, eval the file with Cmd-Shift Enter. Now try your new plugin command Say Hello! For more about writing plugins, see this wiki page.
###Submit a plugin
If it’s your first time submitting a plugin, make sure you have a valid plugin.edn. Fill out the keys as follows:
:name*: Camel case is recommended:version*: Must be in format X.X.X e.g. 0.1.4:source*: Must be a github url e.g. https://github.com/USER/PLUGIN:behaviors*: Refers to the behaviors file which is needed to load the plugin and define any keybinding or behavior.:desc: Primary means users can find your plugin:author: Your name and another useful way to find your plugin
* Means the field is required.
When releasing a new version, you must update the :version key and push the new git tag e.g. git tag X.X.X && git push --tags. With your updated plugin.edn, add or update your plugin to the plugin metadata repository using these instructions.
What is...
###Eval?
Eval, short for evaluation, is the act of executing code inside of a running process. This means you modify the code that is currently executing without having to restart whatever you’re doing. This also gives you the ability to evaluate an expression and see the result of it in real time based on the actual state of your application.
###A REPL?
REPL stands for Read-Eval-Print-Loop, wikipedia has a decent description of it. Basically the gist of it is that it’s a little prompt that you can type code in and when submit that code, it evaluates it, prints the result, and lets you do it again. REPLs make for a great way to try things out. Inside of Light Table we remove the need for a special prompt, and instead you can eval directly in a file to see what something does/evaluates to.
###An Instarepl?
The Instarepl is a term we coined for an editor that evaluates as you type and shows you not only the result of an expression, but also how all the variables in your code are filled in to get that result. This allows you to see data flow through your program and amounts to a sort of real-time debugging. Results are blue and variable values are shown in purple to the right of their use in the code.
###A client?
A client is a process that is connected to Light Table that we can send messages to. Usually these messages revolve around being able to eval code in that process, but they don’t necessarily have to. For example, in order to eval Python code, we run a Python process that talks to Light Table over TCP and acts a client for us to send code to.
###A workspace?
In the Light Table world, a workspace is the group of files and folders that you’re interested in. Workspaces are saved and created automatically, and you can access the last 20 workspaces you’ve used by clicking the “recent” button at the top of the workspace tree.
###A behavior
Light Table’s functionality is defined by functions that respond to a set of triggers. This combination of a function and the triggers that it reacts to is called a behavior. Behaviors serve as the way to define what Light Table does in any number of situations and operate as a very powerful settings system. Behaviors are not applied directly to objects, but rather to “tags”. These tags allow you to specify behavior for kinds of things at different levels of specificity. For example, you can apply behavior to all editors by adding a behavior to the :editor tag or to only clojure editors by adding it to the :editor.clojure tag. To modify behaviors, execute the Settings: User behaviors command.
Other stuff
###What languages does Light Table support?
Light Table’s general editor capabilities will work with most languages out there, but it has deeper language integrations (things like inline eval) for Clojure, ClojureScript, Javascript, Python, HTML, and CSS. More languages can be added via plugins in the future.
###What platforms does Light Table support?
Light Table runs on Windows, Mac OSX 10.7+, and most flavors of Linux.
###Does Light Table auto-update?
Yes, Light Table will download updates in the background and let you know when you need to restart to get the newest version.
###What is Light Table written in?
Light Table, with the exception of specific language clients, is written almost entirely in ClojureScript. For more detail on how it is architected, take a look at Chris’s blog post The IDE as a Value.